05 - Connecting to the Dataset
The data added through the extension can be easily used as a new data source for Tableau and displayed on the visualizations. To achieve this, you need a database user that has at least read access to the schema that the extension is using and follow this procedure:
01 - Create a Connection on Tableau Desktop
If you are using Tableau Desktop for some time you should be familiar with the process of creating a new connection to a database, however, if it is your first time creating a connection here is the process:
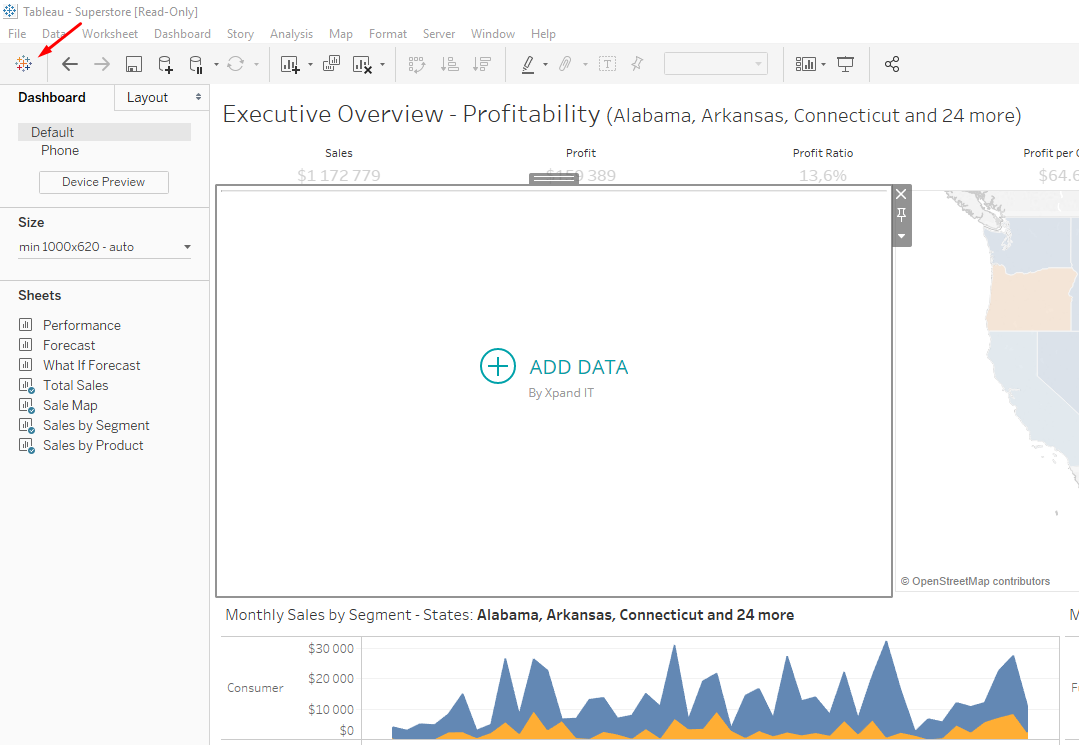
- Click the tableau icon on the top left corner
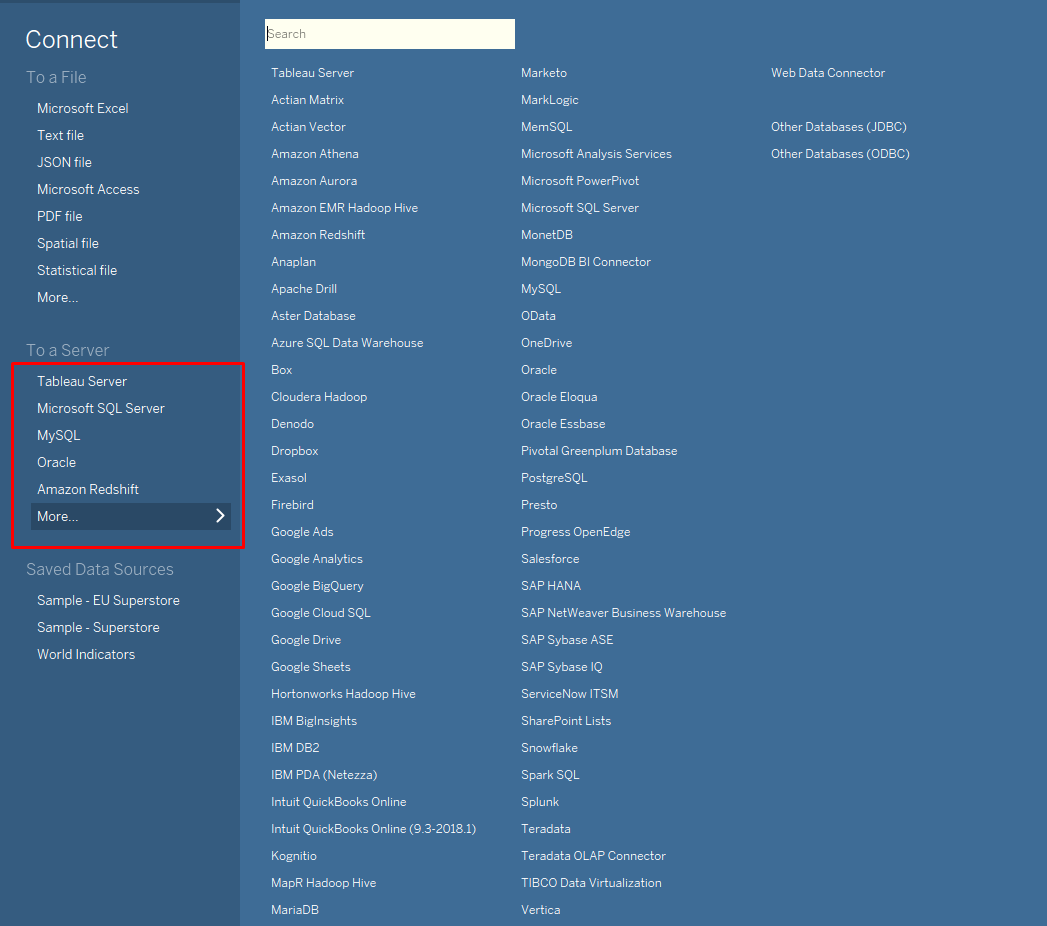
- Choose the server where the data is stored (inside the red area)
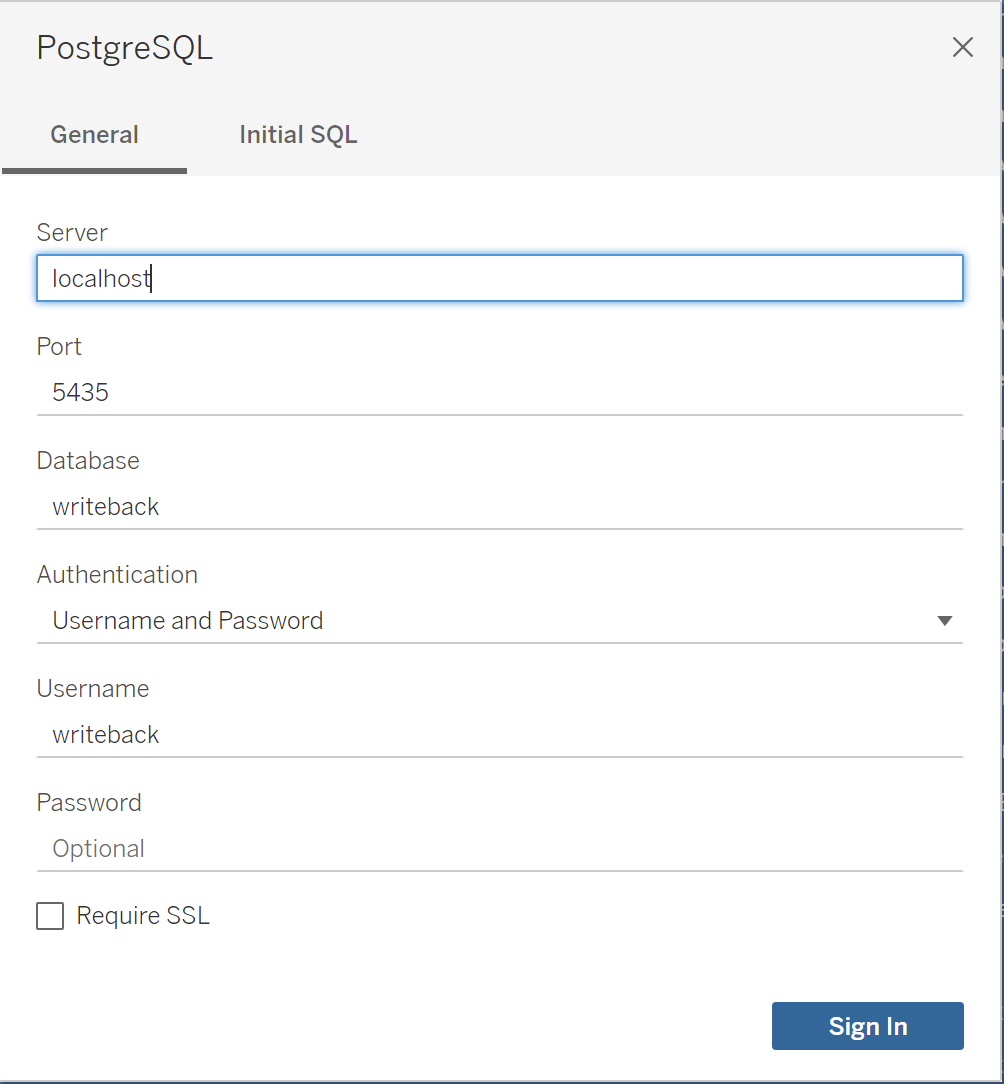
- Initialize the connection with the right credentials
Please make sure you have the necessary DB connection drivers installed for the connection to work (Where to find these drivers?).
01.1 - Write-Back database defaults
If you are using the default settings that leverage Write-Back internal database you need to.
- Create a PostgreSQL connection
- Provide the following information:
- Server: localhost
- Port: 5435
- Database: writeback
- Username: writeback
- Password: password
02 - Configure the Data Source
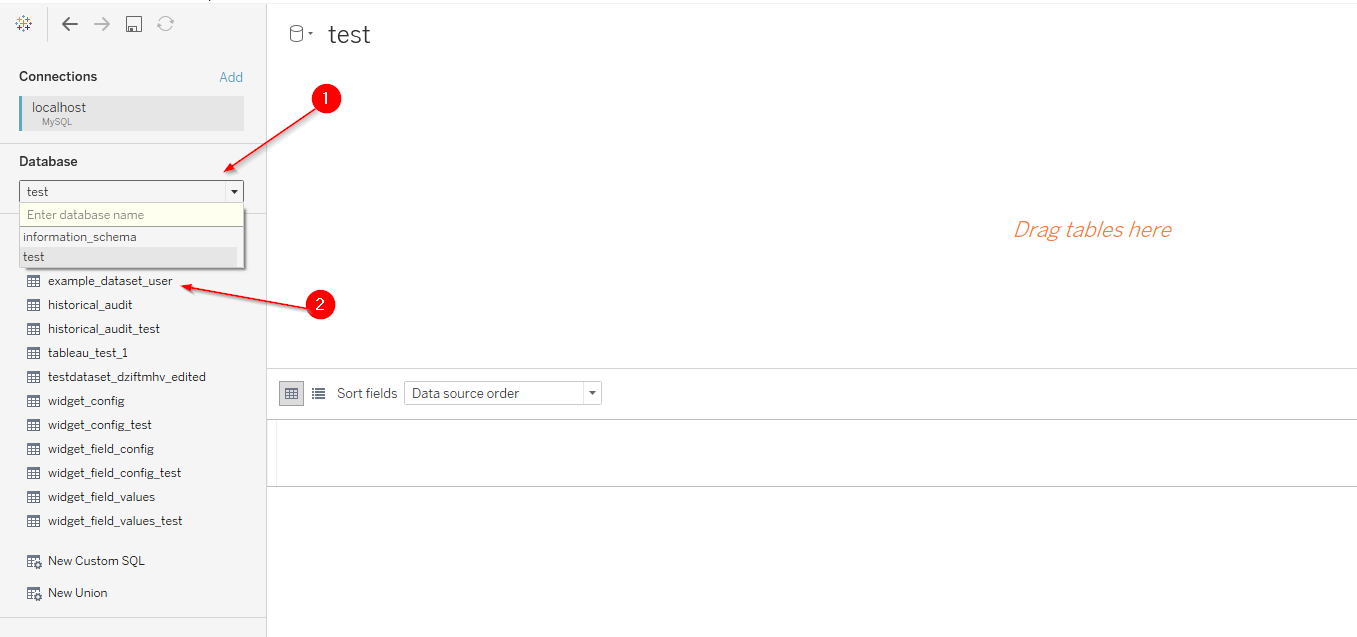
After this initial setup, you will be able to choose the database where all the datasets are stored and select the table with data. You will notice that the dataset names might not be exactly correspond to table names. This happens because we are replacing special characters and white spaces. As an example: "Forecast Sales-profit in California" becomes "forecast_salesprofit_in_california".
- Select the correct database
- Search for the dataset you want to work on
02.1 - Getting Audit Information
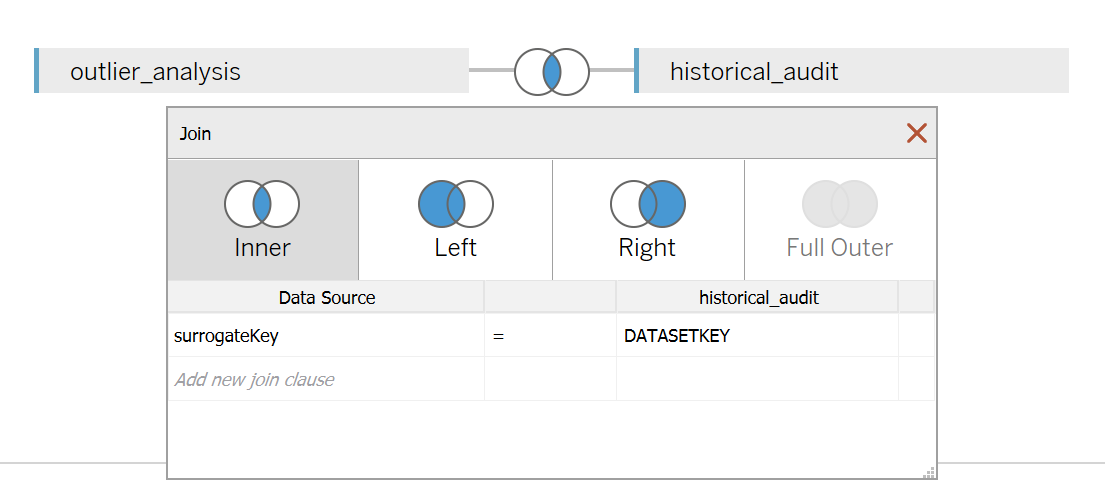
Depending on your use case besides the actual data you might want to get the information about the user that submitted the record. This can easily be achieved by joining your data set with the historical_audit table. The historical_audit table is automatically populated by the extension keeping track of all the actions taken by users.
The join clause should be as per below:
- Dataset Table, column surrogateKey equals historical_audit DATASETKEYcolumn.
With this join, you get access to fields such as:
Field | Example | Description |
|---|---|---|
| ACTIONNAME | ALTER_DATASET | The type of user's action, which can be INSERT_DATA, DELETE_DATA or EDIT_DATA |
| SYSTEM | Server | The system where the user performs actions. Possible values include 'Server' or 'Desktop'. |
| USERNAME | username | The user that performed the action. |
03 - Filter Inactive Data
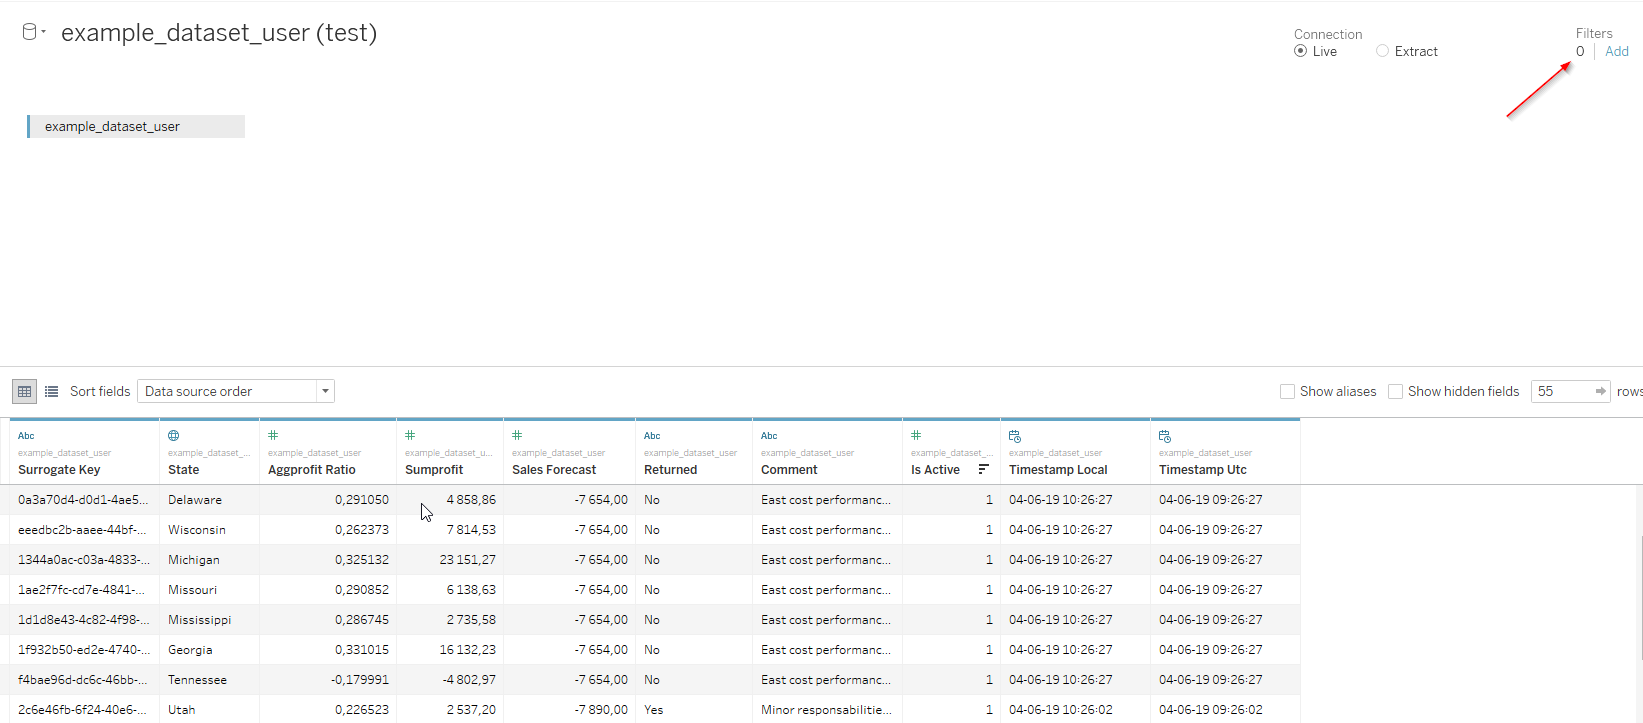
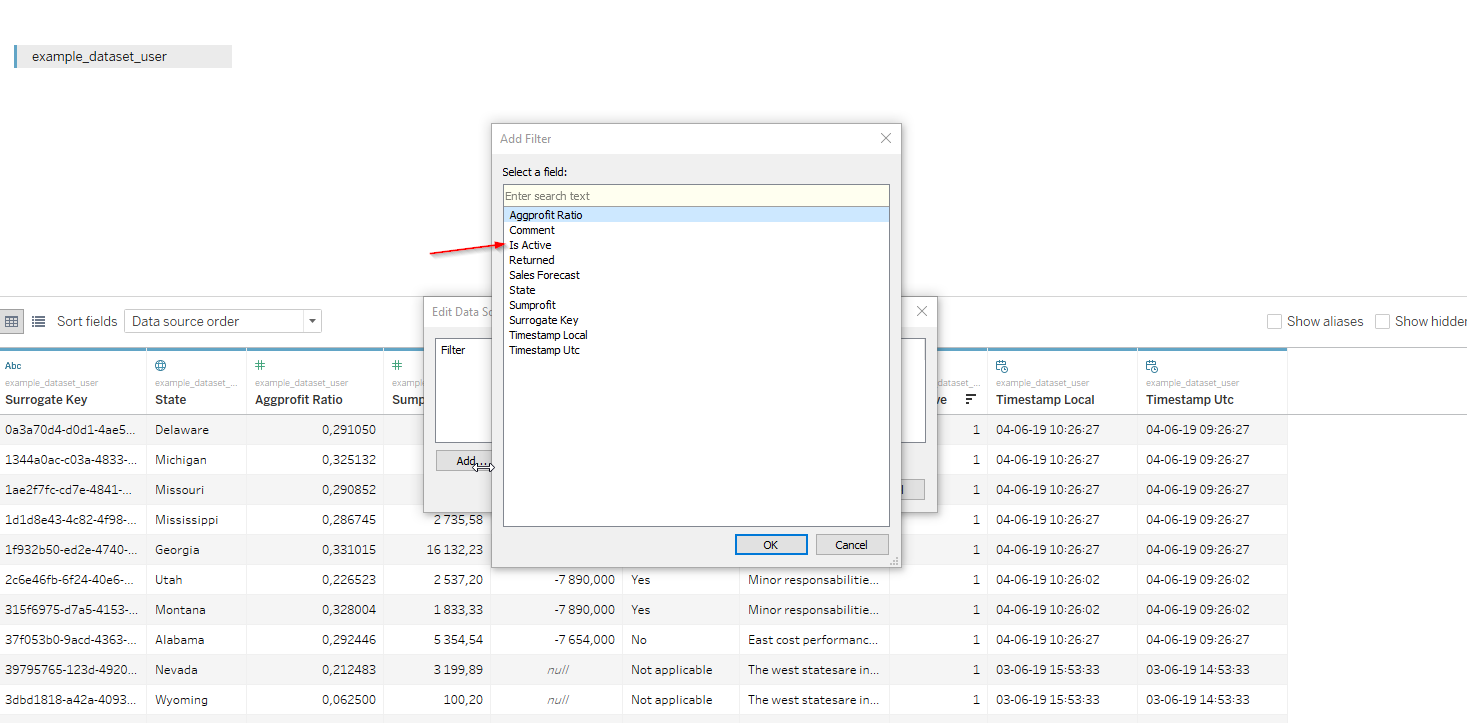
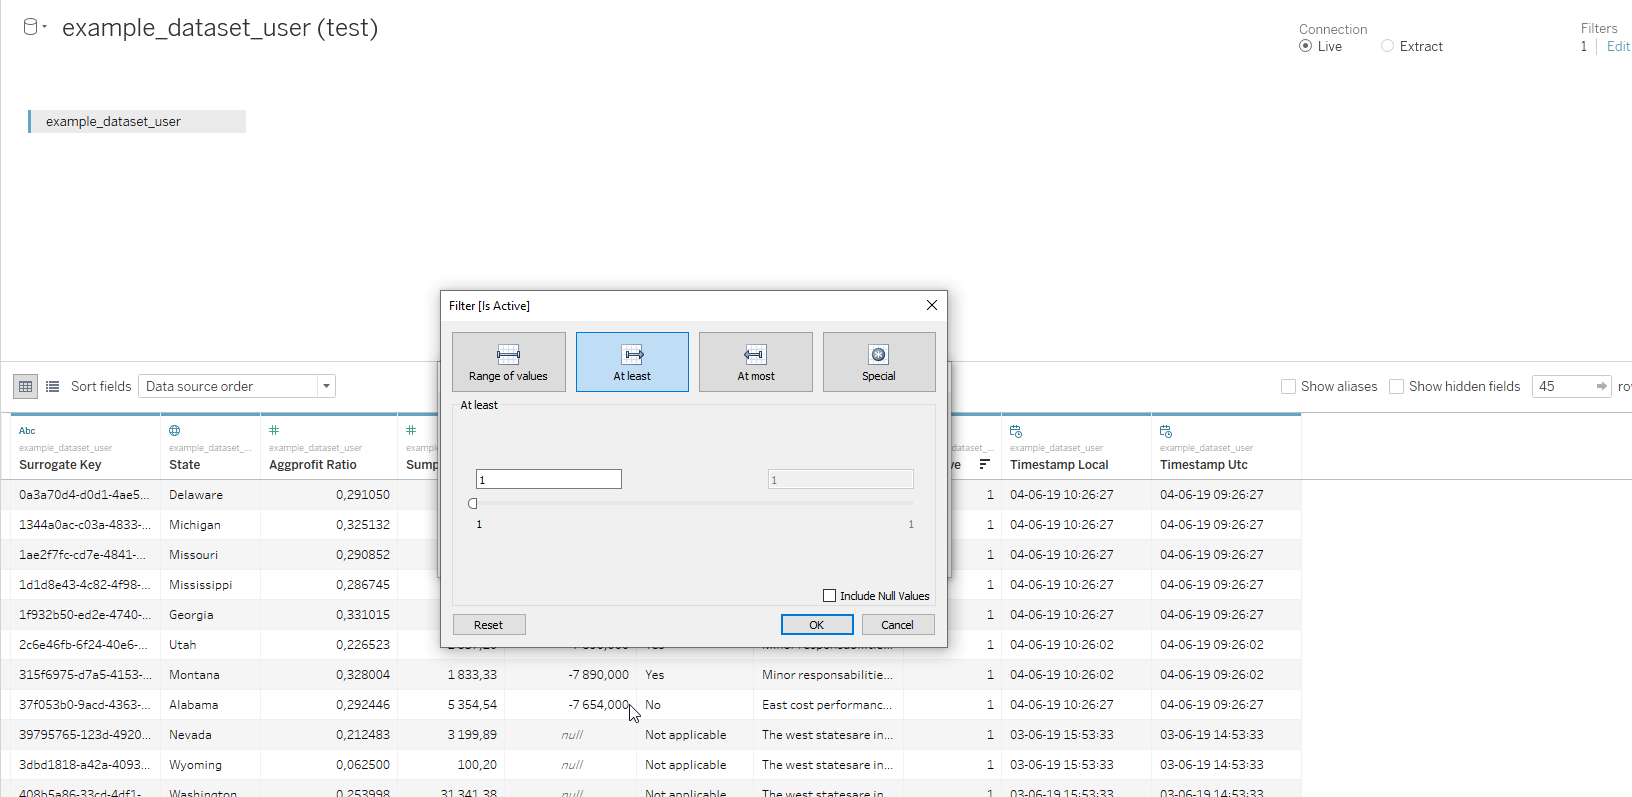
The extension keeps track of all data changes for auditing purposes. This means that the tables come with rows that have been deleted or previous versions of edited records. If you want to retrieve only the information that is active you need to filter the data source for the isActive = 1.
To do so:
- Click the filter button on the top right corner
- Choose the isActive column
- Then select filter by At least and select a minimum value 1
- Click Ok and then update data
04 - Join Write-Back Data with Existing Data
From here you are pretty much settled. You can now analyze the data by creating all the visualizations you might require and join it with existing data.
Tableau makes available multiple ways to achieve this:
- Relationships - If you are using Tableau 2020.2 or above do use Relationships to connect the two datasets even if you have a many-to-many relationship. The main limitation of this option is that you cannot use calculated fields on the join.
- Datablend - For more information on how to use Datablend and join different tables with the dataset please consider the following Tableau documentation: Data Blending with multiple sources
- Join on multiple databases - Another alternative is to Combine tables from different databases, in this case, the steps above are followed by adding a new connection inside an existing data source.
